Summer Vacation - Day 1

It wasn't really the 1st day of summer vacation, but it was the last day of school, so we're counting it anyway.

We went swimming.


Summer Vacation - The Prep

with summer vacation just around the corner (thank the heavens above!) we have begun to create a list of all the things we want to do, or hope to do this summer.  Hopefully that means we won't miss out on any of the fun!


Cook Eggs in Bell Peppers or Onion Rings for a Simple, Clever Breakfast Treat [Food Hacks]

Cook Eggs in Bell Peppers or Onion Rings for a Simple, Clever Breakfast Treat [Food Hacks]:
Bell peppers and onion rings make ingenious ring molds for eggs in the skillet. Not only do they impart wonderful flavor to the egg and keep the egg contained, they also look so beautiful. More »


Sour Cream and Onion Chip Bracelets

Sour Cream and Onion Chip Bracelets:
Did you know that March 14th was National Potato Chip day in the United States? Well, it's probably not like Christmas, but I did make some bracelets from recycled potato chip bags to celebrate!
My daughter received several compliments when she wore them. I used a sour cream and onion potato chip bag, but use whatever flavor(color) you want! You can find the instructions here. If you need fun inspiration on recycling chip bags, you can check out my post here.
Potato chips....We Salute You!!!

LOFTHOUSE STYLE SUGAR COOKIE BARS

LOFTHOUSE STYLE SUGAR COOKIE BARS:
 Confession:
I have never sunk my teeth into a Lofthouse cookie.
Therefore:
I can’t say whether or not these taste like a Lofthouse cookie!
I’ve always wondered . . . why all the hype?
I guess I will never know, until I actually eat one.
My daughters . . . love them!


A lofthouse cookie is described  as dense, soft, delicious and out of this world.
I found this recipe over at Today’s Mama.
According to my tasters, these bar type cookies are close . . . but not the real mccoy.
I didn’t care, I ate most of the pan.
Make them the day before you want to serve them, because they are twice as yummy the next day . . . I promise.


This recipe intriqued me, because instead of sour cream the recipe call for Cream Cheese instead.
Oh yes . . .I thought this would give it that dense consistency.


The dough is yummy, but a real bugger to spread on a greased baking sheet.
Hint:
Lightly wet your spatula and pat it out, rather than trying to spread it out.


finally!


While your bars are baking, you can make the frosting.


I decided on that peachy color . . . I’m not sure I liked that peachy color.


The color was weird, so I figured sprinkles would help.
They did, but the color was still odd.
Make sure that your pan of bars is cool, before you frost.
Note:
These really are better . . . the next day . . . they soften . . . they become very yummy . . . and dense.
So frost them and cover them and hide the pan under your bed.
Pull it out in the morning and try to stay out of them.


 Yeah right.

    Print This   
SUGAR COOKIE BARS
NOTE:  These bars are best made the day ahead before serving.  They soften and become denser and delicious!
1 1/2 C sugar
1 C butter, softened
8 oz cream cheese, softened
1 egg
1/2 t almond extract
1 t vanilla
1/2 t baking soda
1 t baking powder
2 1/2 C flour

FROSTING:
1/2 C butter softened
4 oz cream cheese, softened
3 1/2 C powdered sugar
3-5 T milk
1 t vanilla
food coloring
1. In a large mixing bowl or stand mixer beat the butter, cream cheese, sugar, and egg  until nice and frothy. About 4 minutes.
2. Add the vanilla and almond extract and beat for 1 minute more.
3. In a small bowl combine the flour, baking powder and baking soda. Mix them around so that all ingredients are well incorporated.
4. Add the flour mixture to the butter mixture and beat for about 2 minutes.
5. Press the dough into a large jelly roll (cookie sheet) pan.
6. Bake at 350 degrees for 20 minutes. Or until a toothpick in the center comes out clean.
7. Let the pan cool completely.
8. Time to make the frosting. In a medium sized bowl (or your stand mixer) combine the butter and cream cheese. Beat for about 2 minutes.
9. Add the powdered sugar, milk, vanilla and food coloring. Mix for 1-2 minutes or until smooth.
10. Frost your pan of cookies. Cut the cookies into bars and serve!
NOTE:  These bars are best made the day ahead before serving.  They soften and become denser and delicious!


Print Friendly

Bow sleeve t-shirt

So cute!!


Bow sleeve t-shirt: *****I just wanted to add here that I found the original of this where I got the idea! It does show up on the sew whats new website, but it is actually from this Refash Co-op blogger ruby murrays musings. Go check out her tutorial for the step by step and the original idea! I love how she used a striped top...it definitely gives the sleeves even more interest!*****

Here's a quick long sleeved t-shirt to short sleeved t-shirt refash that I saw over at sew-whats-new.com. ( they have the how-to with helpful photos, sorry :( I haven't managed to slow down enough to make up 'tutes' for my refashions)

I started by chopping off the sleeves, cutting off the cuffs of each sleeve and then cutting straight up the sleeves from one end to the next on the underside. I then gathered each sleeve and wrapped the cuff around the middle to form the bows (no waste here!). Next I sewed the bows onto their respective shoulders and even stitched parts of the folds of the bow to the top so that it would drape nicely over the shoulder. I left the raw edges of the arm holes as-is, and think they look just fine. You could absolutely take this a step farther with extra added details if you're using a super plain t-shirt like mine. Lace, rosettes, felt flowers, ruffles, beads, buttons, etc could really glam this up!
And again no before, but you can imagine what it looked like...long sleeves
It went from a long sleeved t-shirt that I'd only wear when not leaving the house :) to a super cute top that I can dress up with...you guessed it! A pencil skirt! Please totally ignore the fact that my mirror is dirty...and probably has been for a couple of weeks...don't hate! Haha, I quickly cleaned it AFTER taking the photo. Hope you enjoy seeing my version!

Andrea
LittleDidYouKnow

Roasted

I've never roasted a chicken before, and last week the topic of how and why I should be roasting chickens came up three times (puff paint came up three times as well but I'm ignoring that.)

So tonight with my small audience of two looking on, I washed, stuffed and roasted a chicken. Of course we couldn't eat it, as it was ready far after hungry girls needed to eat, but I did it.

2 and 3... flying by

I haven't forgotten our blog, we've just been busy, busy busy!

We've been baking bread, but unfortunately it smells better than it tastes, which means we need to bake more...

We decorated for Valentine's Day. But no Valentine Tree this year.  The poor cats have apparently now been deemed holiday mascots. I will however draw the line at making them clothing.

I've finished a few more cowls. Black for me, dark purple for Teagan and the lighter purple for Lydia. And yes, that light purple was the caplet that turned out to be Teagan sized, and a scarf for Lydia before I unraveled each of them.

I'm reading the 2nd Girl With the Dragon Tattoo book, and considering watching the movies in Swedish on NetFlix. However, since seeing the first film, I've become subconsciously convinced I am living in Sweden (as in "oh, we need rye bread" or "this sweater would be great for Swedish winters") And yes, I realize it's totally nuts. Moving on...

We also squeezed in 2 weekend trips to Tahoe in the last 2 weeks. Last weekend there was no snow. I know everyone had been saying there was no snow, but I couldn't really grasp it until I was there staring at it, and even then I must have said "There is no snow" about 150 times. So no skiing last weekend, but I did get to shoot a rifle for the first time.

This weekend, the snow arrived, and luckily we arrived right before the storm and were able to stay until the snow stopped falling. The girls had a great time sledding, making snow angels, having snowball fights and building snowmen and snowcats. Don't ask, I have no idea myself.


Photo Pillows, hmm... this might be cute

I saw this post from Martha today and it got me thinking... I like the idea of the image on the pillow, but I think it would be cuter if with binding, so it looked like it was in a frame. I have seen the quilts like this, but that's too many images for me, and too many colors. This is going to require more thought...

Photo Pillows:


Back
Next
1 of 3


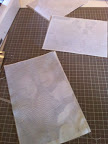
Silk prints and linen backings cut to size

1 Silk prints and linen backings cut to size


Right sides facing inward before sewing closed.
2 Right sides facing inward before sewing closed.


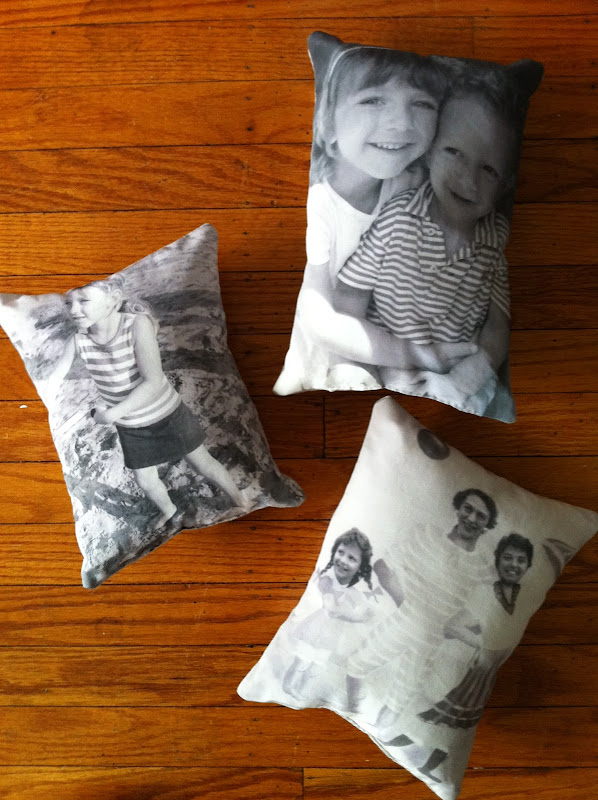
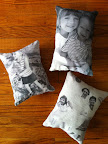
Finished pillows - 2 with grandchildren and one vintage photo from her childhood.

3 Finished pillows - 2 with grandchildren and one vintage photo from her childhood.


  • Silk prints and linen backings cut to size

  • Right sides facing inward before sewing closed.

  • Finished pillows - 2 with grandchildren and one vintage photo from her childhood.


About 10 years ago I made my mother photo pillows for Christmas. It was before she had grandchildren, so I made them with some vintage photos from her childhood. Those pillows have definitely seen better days and this Thanksgiving she mentioned how much she loved them but that they were getting "a little ratty". The originals were made with iron-on transfers and I thought this time I would try something different. I had been wanting to experiment with Jaquard's line of inkjet fabrics - so this was the perfect opportunity. I opted for the silk habotai, it comes in 8.5 x 11 sheets as well as 8.5" x 120" rolls. The fabric is fused to a paper backing that is easily removed once you print. After printing and removing paper, I backed the silk with fusible interfacing to give it a bit more structure and then sprayed them with Scotch Gard (to make them water resistant). I cut heavyweight linen for the back of the pillow and sewed it on all 4 sides (leaving a hole in the bottom to stuff - which I then hand-sewed closed after filling.) For a project like this I much prefer the printable fabric to an iron-on. They were a bit hit with my mom as well- she definitely preferred the silk - but I think she was most excited that this time I used photos of my niece and nephew!